The Epson printer is well known because of its good quality, depending on what printer you have you will be able to print photos with any Epson printer, you will get good photographic quality thanks to the type of ink these printers use.
The DURABrite® ink cartridges with pigmented ink allow you to get the better qualities in your photographic printings. It is convenient to consult the manufacturer's documentation before placing any kind of paper in your printer different from the normal A4, the thickness of the paper also influences a lot.
Normally the size of photographic papers that you can use to print in domestic or multifunction Epson printer are the following ones: A4, Letter (8,5 × 11 inch; 21,6 × 27,9 cm), 4 × 6 inch. (10,2 × 15,2 cm), 5 × 7 inch. (12,7 × 17,8 cm) when you know that the paper you have is adequate to print there are some other characteristics to take into account before starting printing photos in Epson printers, next we will show you some of those characteristics.
Set the file before sending to print
Eliminate all the edges that the image that you are going to print could have, you have to take into account that when you print an image with the image setting, if sent from the computer with the image setting, the printer will take away a little space on the sides.
Place the paper in the printer
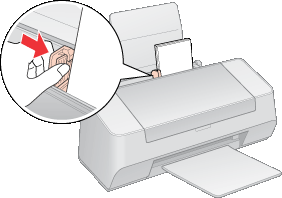
It is really important to place the paper to print the photos correctly in the printer, you should know that the paper size can vary from the paper you use to print on, you will have to manipulate the guide so the pages fit and they can enter the printing process without any problem.
see image…
 |
| epson printer pages guide |
Arrange the paper before placing it in the printer
Photographic paper is a little more rigid than the other types of paper, to obtain the quality you are looking for when printing photos what you have to do is to verify that the photographic paper is in good conditions, it means it is not wrinkled, when storing the paper you must always do it properly.
see following image...
 |
| how to store photographic paper |
Usually photographic paper has one softer and satin surface than the other, you have to place the soft and satin surface in a way that images are print on that surface.
Setting the photographic paper from the computer
From your computer you have to tell the printer what kind of paper you are using to print photos, this way you will obtain better quality, it is not just to place the paper and click on print, if you do so you will have the quality of a common or A4 printing, however with the photographic settings from printer properties is what makes the difference between a common printing and a photo.
The procedure to set the photographic paper from the computer
The procedure for the printer setting from the computer is simple, we will quickly explain it read the following information carefully, in case of having problems please contact us, we will gladly help you.
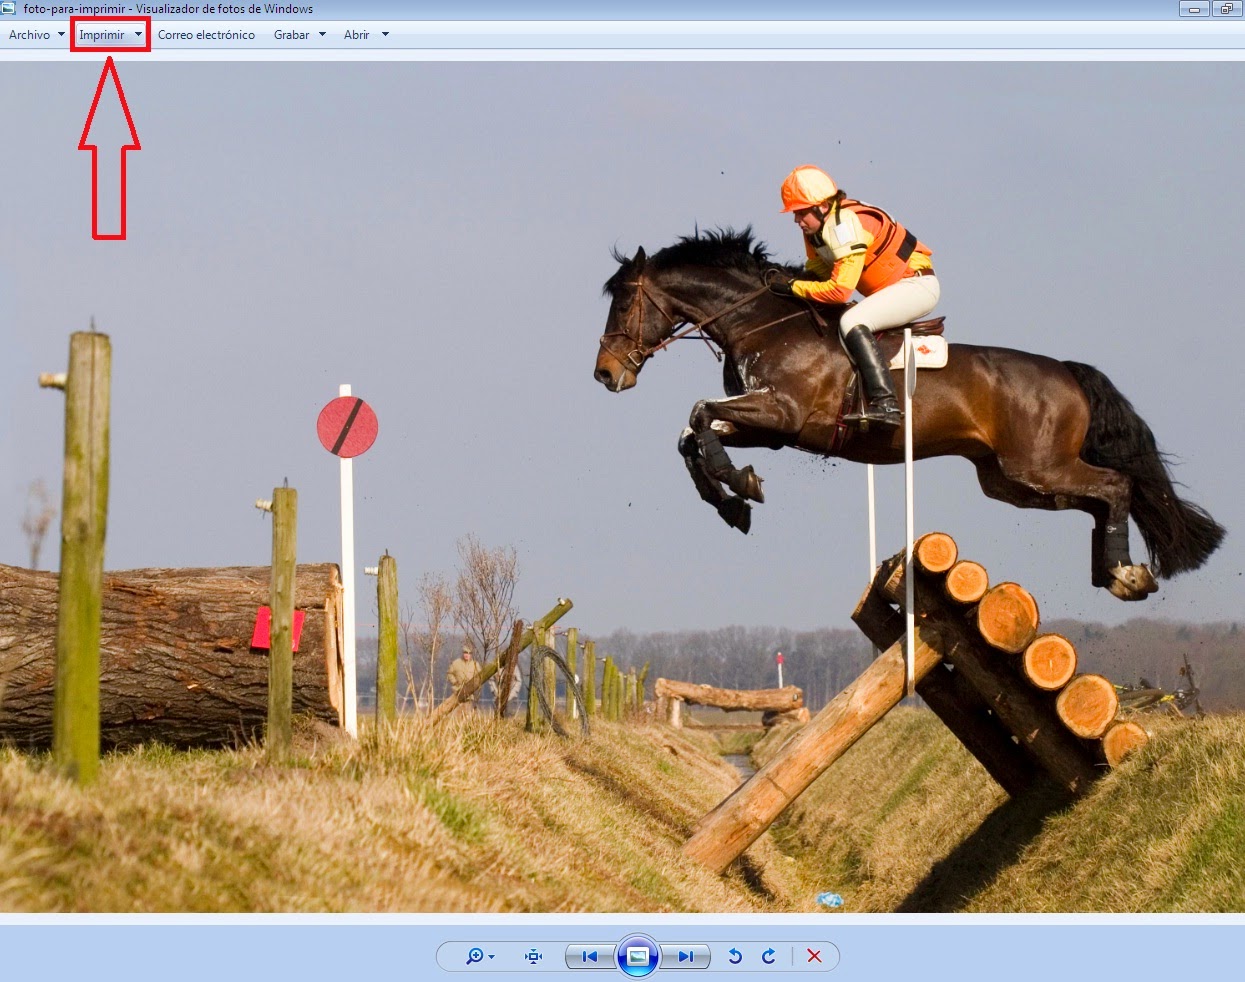
- Open the image or that you want to print.
- Next step is to click on print, normally this option is found at the left top. see the following image...
 |
| print a photo |
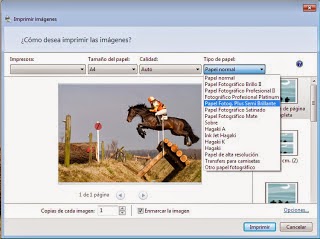
When about to print access the printer properties option and set it to print photos. In printer properties what you will do is to select the type of paper you are going to print on, also select the type of printing you will do. You will have to set the type of quality and paper. see image...
 |
| page setting |
It is recommended to select the “picture” or “superior picture” printing quality option and about the paper you can select the option you consider the best, remember to check the paper position before it gets to the printing process as well as the paper good condition.
It is recommended to select the printing without margins option, so later you do not have to cut the page. You can change the picture orientation, you can select between horizontal and vertical and to start printing just click on the print option.


COMMENTS