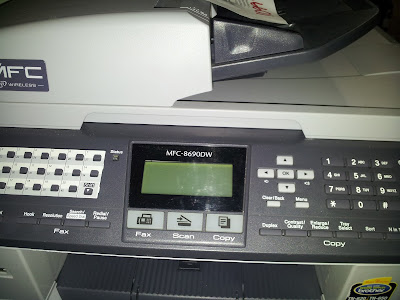
The machine will clean the printhead once the cleaning is done, the machine will displays “Ready” mode automatically.
To maintain good print quality, your machine will automatically clean the printhead as many times as possible. However, you can also do the cleaning manually if you found out there is a problem with the print quality, for example, a horizontal line on the next, blank pages or discolored prints.
You will also be able to clean the black color separately from the three colors (Cyan, Yello, Magenta) or all four colors at once.
Note:
Cleaning the printhead consume ink, a recurrent cleaning will unnecessarily use the ink.
If your Brother machine is a touchscreen, please follow these steps below:
- In the opposite case,
a. Press the MENU button.
b. Press the navigation arrow upwards or downwards in order to select INK.
c. Press the OK button.
2. Press CLEANING.
3. Select BLACK, COLOR or ALL, depending on what you wish to clean.
The machine will clean the printhead once the cleaning is done, the machine will displays “Ready” mode automatically. If you are experiencing print quality problems, we recommend you repeat the printhead cleaning process for each color showing the problem, at least four (4) times.
If you’re experiencing print quality problems and you want to see if the cleaning is improving it, print a Print Quality Check Sheet (PQCS) after the first cleanse, and then print another PQCS after repeating each step of the head print cleanse at least three (3) or more times (4 cleanses in total). You can then compare both PQSC’s.
Follow the next steps to print a Print Quality Check Sheet (PQSC)*:
*If your Brother machine has a touchscreen, please follow the steps in “For models with a touchscreen.”
- In the opposite case,
a. Press the MENU button.
b. Press the navigation arrow upwards or downwards in order to select INK.
c. Press the OK button.
2. Press the navigation arrow upwards or downwards in order to select the TEST PRINT.
3. Press the OK button.
4. Press the navigation arrow upwards or downwards in order to select PRINT QUALITY.
5. Press the OK button.
6. Press the COLOR START button.
2. Press TEST PRINT.
3. Press PRINT QUALITY.
4. Press the COLOR START button.
You will also be able to clean the black color separately from the three colors (Cyan, Yello, Magenta) or all four colors at once.
 |
| use brother printer |
Cleaning the printhead consume ink, a recurrent cleaning will unnecessarily use the ink.
If your Brother machine is a touchscreen, please follow these steps below:
1. Follow one of the steps below:
- If your Brother machine has an INK button on its control panel, press it.- In the opposite case,
a. Press the MENU button.
b. Press the navigation arrow upwards or downwards in order to select INK.
c. Press the OK button.
2. Press the navigation arrow upwards or downwards in order to select CLEANING.
- Press the OK button.
- Press the navigation arrow upwards or downwards in order to select BLACK, COLOR or ALL, depending on what you wish to clean.
- Press the OK button.
For models with a touchscreen:
1. Press (INK INDICATOR).2. Press CLEANING.
3. Select BLACK, COLOR or ALL, depending on what you wish to clean.
The machine will clean the printhead once the cleaning is done, the machine will displays “Ready” mode automatically. If you are experiencing print quality problems, we recommend you repeat the printhead cleaning process for each color showing the problem, at least four (4) times.
If you’re experiencing print quality problems and you want to see if the cleaning is improving it, print a Print Quality Check Sheet (PQCS) after the first cleanse, and then print another PQCS after repeating each step of the head print cleanse at least three (3) or more times (4 cleanses in total). You can then compare both PQSC’s.
Follow the next steps to print a Print Quality Check Sheet (PQSC)*:
*If your Brother machine has a touchscreen, please follow the steps in “For models with a touchscreen.”
1. Follow one of the steps below:
- If your Brother machine has an INK button on its control panel, press it.- In the opposite case,
a. Press the MENU button.
b. Press the navigation arrow upwards or downwards in order to select INK.
c. Press the OK button.
2. Press the navigation arrow upwards or downwards in order to select the TEST PRINT.
3. Press the OK button.
4. Press the navigation arrow upwards or downwards in order to select PRINT QUALITY.
5. Press the OK button.
6. Press the COLOR START button.
For models with a touchscreen:
1. Press (INK INDICATOR).2. Press TEST PRINT.
3. Press PRINT QUALITY.
4. Press the COLOR START button.


COMMENTS